Mybatis基本使用入门 1. Mybatis 简介 Mybatis 是一款优秀的持久层框架,它在简化了我们对数据库的操作和资源管理的同时,允许开发者自定义 SQL,保留了灵活性,是目前国内互联网环境中用得最多的 ORM 框架
它支持使用 XML 和 注解 两种方式来配置,一般来说我们推荐用 XML 配置:
一来可以集中配置,把配置放在一起;二来有比较好的插件支持,书写、生成都很方便,代码提示也更好
2. 环境准备 我们使用 docker 在本地搭建一个的 Mysql 环境:
run --name mysql \MYSQL_ROOT_PASSWORD =123456 \
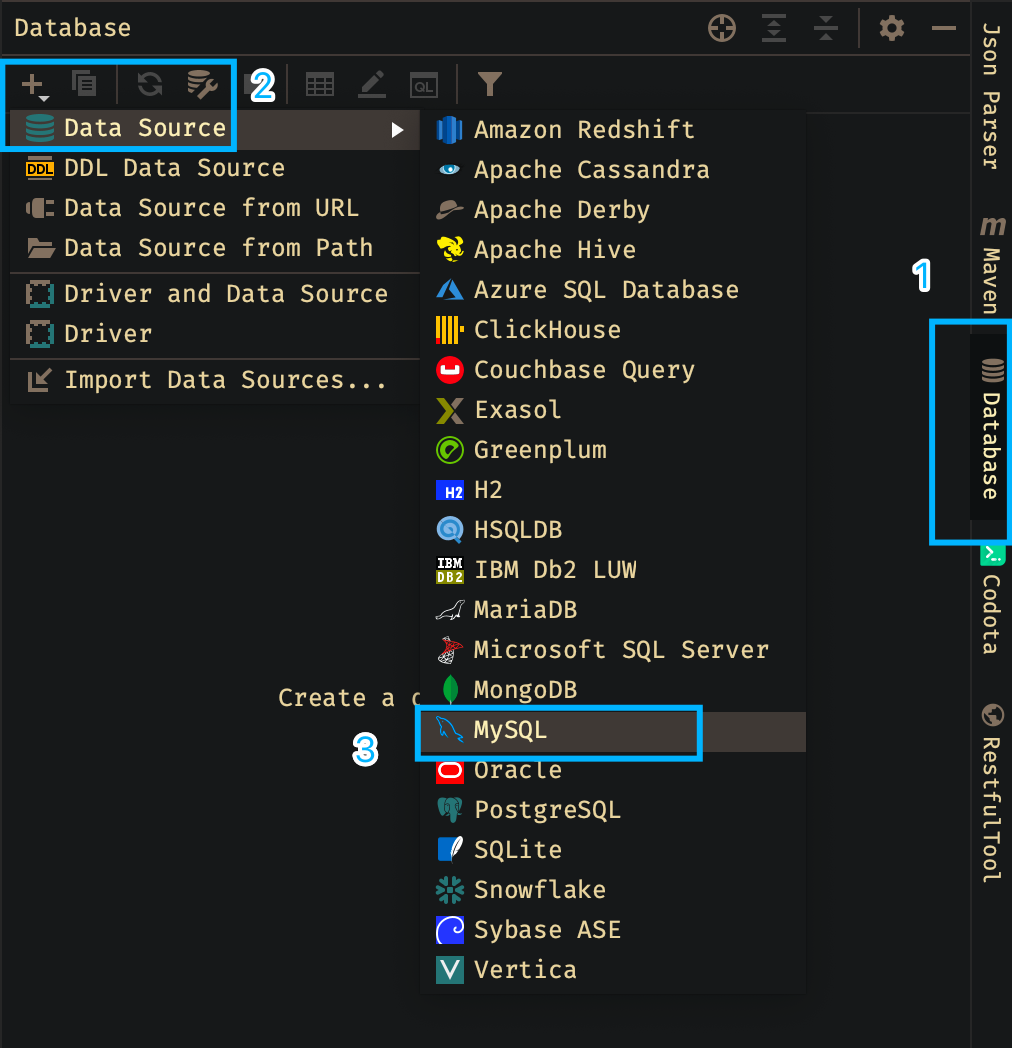
我们使用 Navicat 等工具连接数据库,创建一个数据库:mybatis
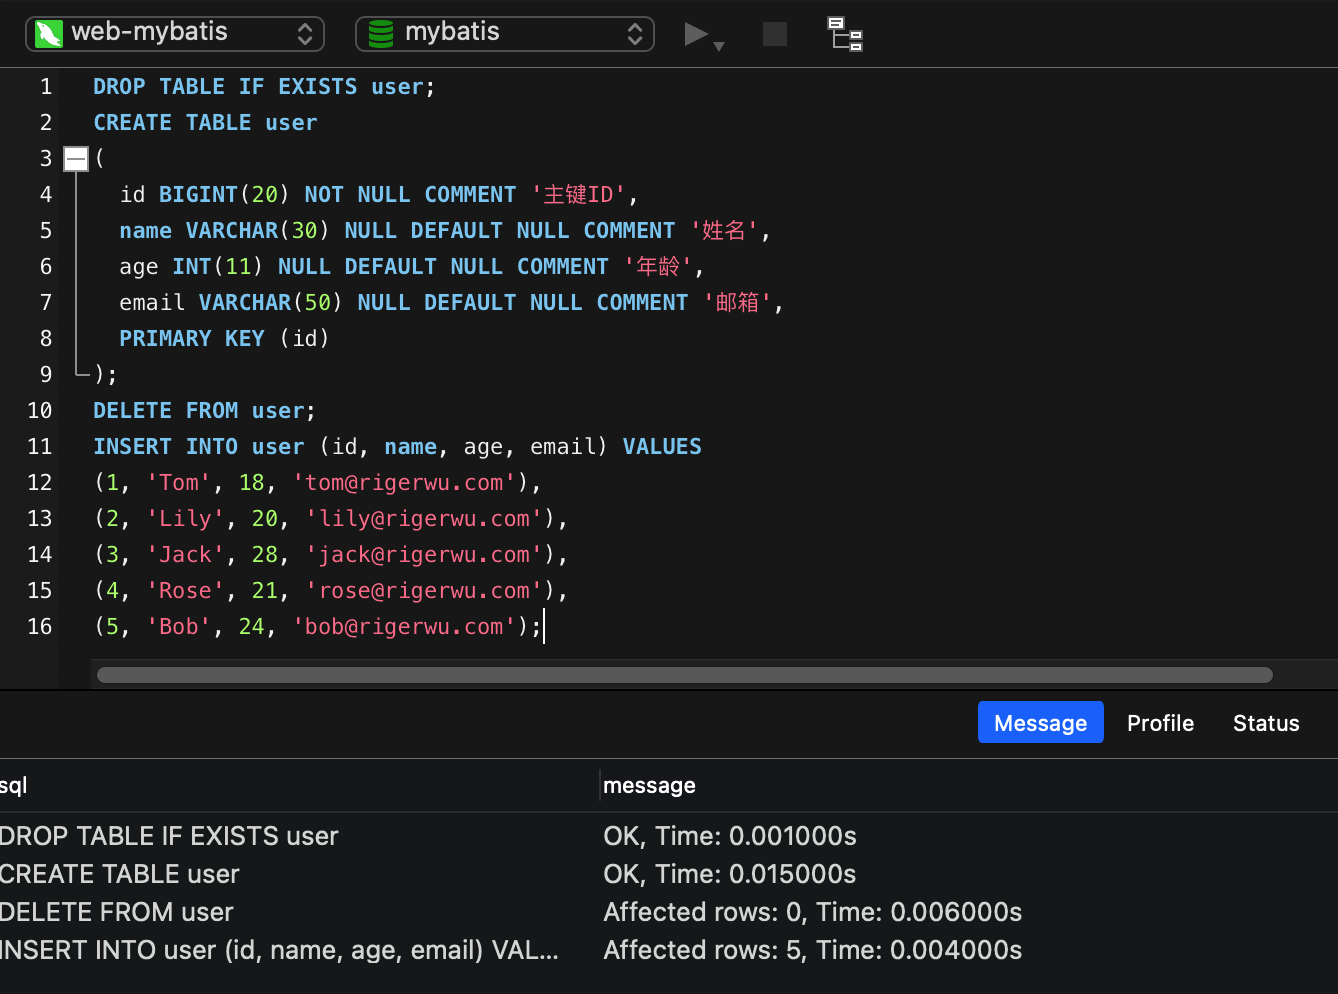
再准备一点数据,用作后面的测试:
DROP TABLE IF EXISTS user ;CREATE TABLE user id BIGINT (20 ) NOT NULL AUTO_INCREMENT COMMENT '主键ID' ,name VARCHAR (30 ) NULL DEFAULT NULL COMMENT '姓名' ,INT (11 ) NULL DEFAULT NULL COMMENT '年龄' ,VARCHAR (50 ) NULL DEFAULT NULL COMMENT '邮箱' ,KEY (id )DELETE FROM user ;INSERT INTO user (id , name , age, email) VALUES 1 , 'Tom' , 18 , 'tom@rigerwu.com' ),2 , 'Lily' , 20 , 'lily@rigerwu.com' ),3 , 'Jack' , 28 , 'jack@rigerwu.com' ),4 , 'Rose' , 21 , 'rose@rigerwu.com' ),5 , 'Bob' , 24 , 'bob@rigerwu.com' );
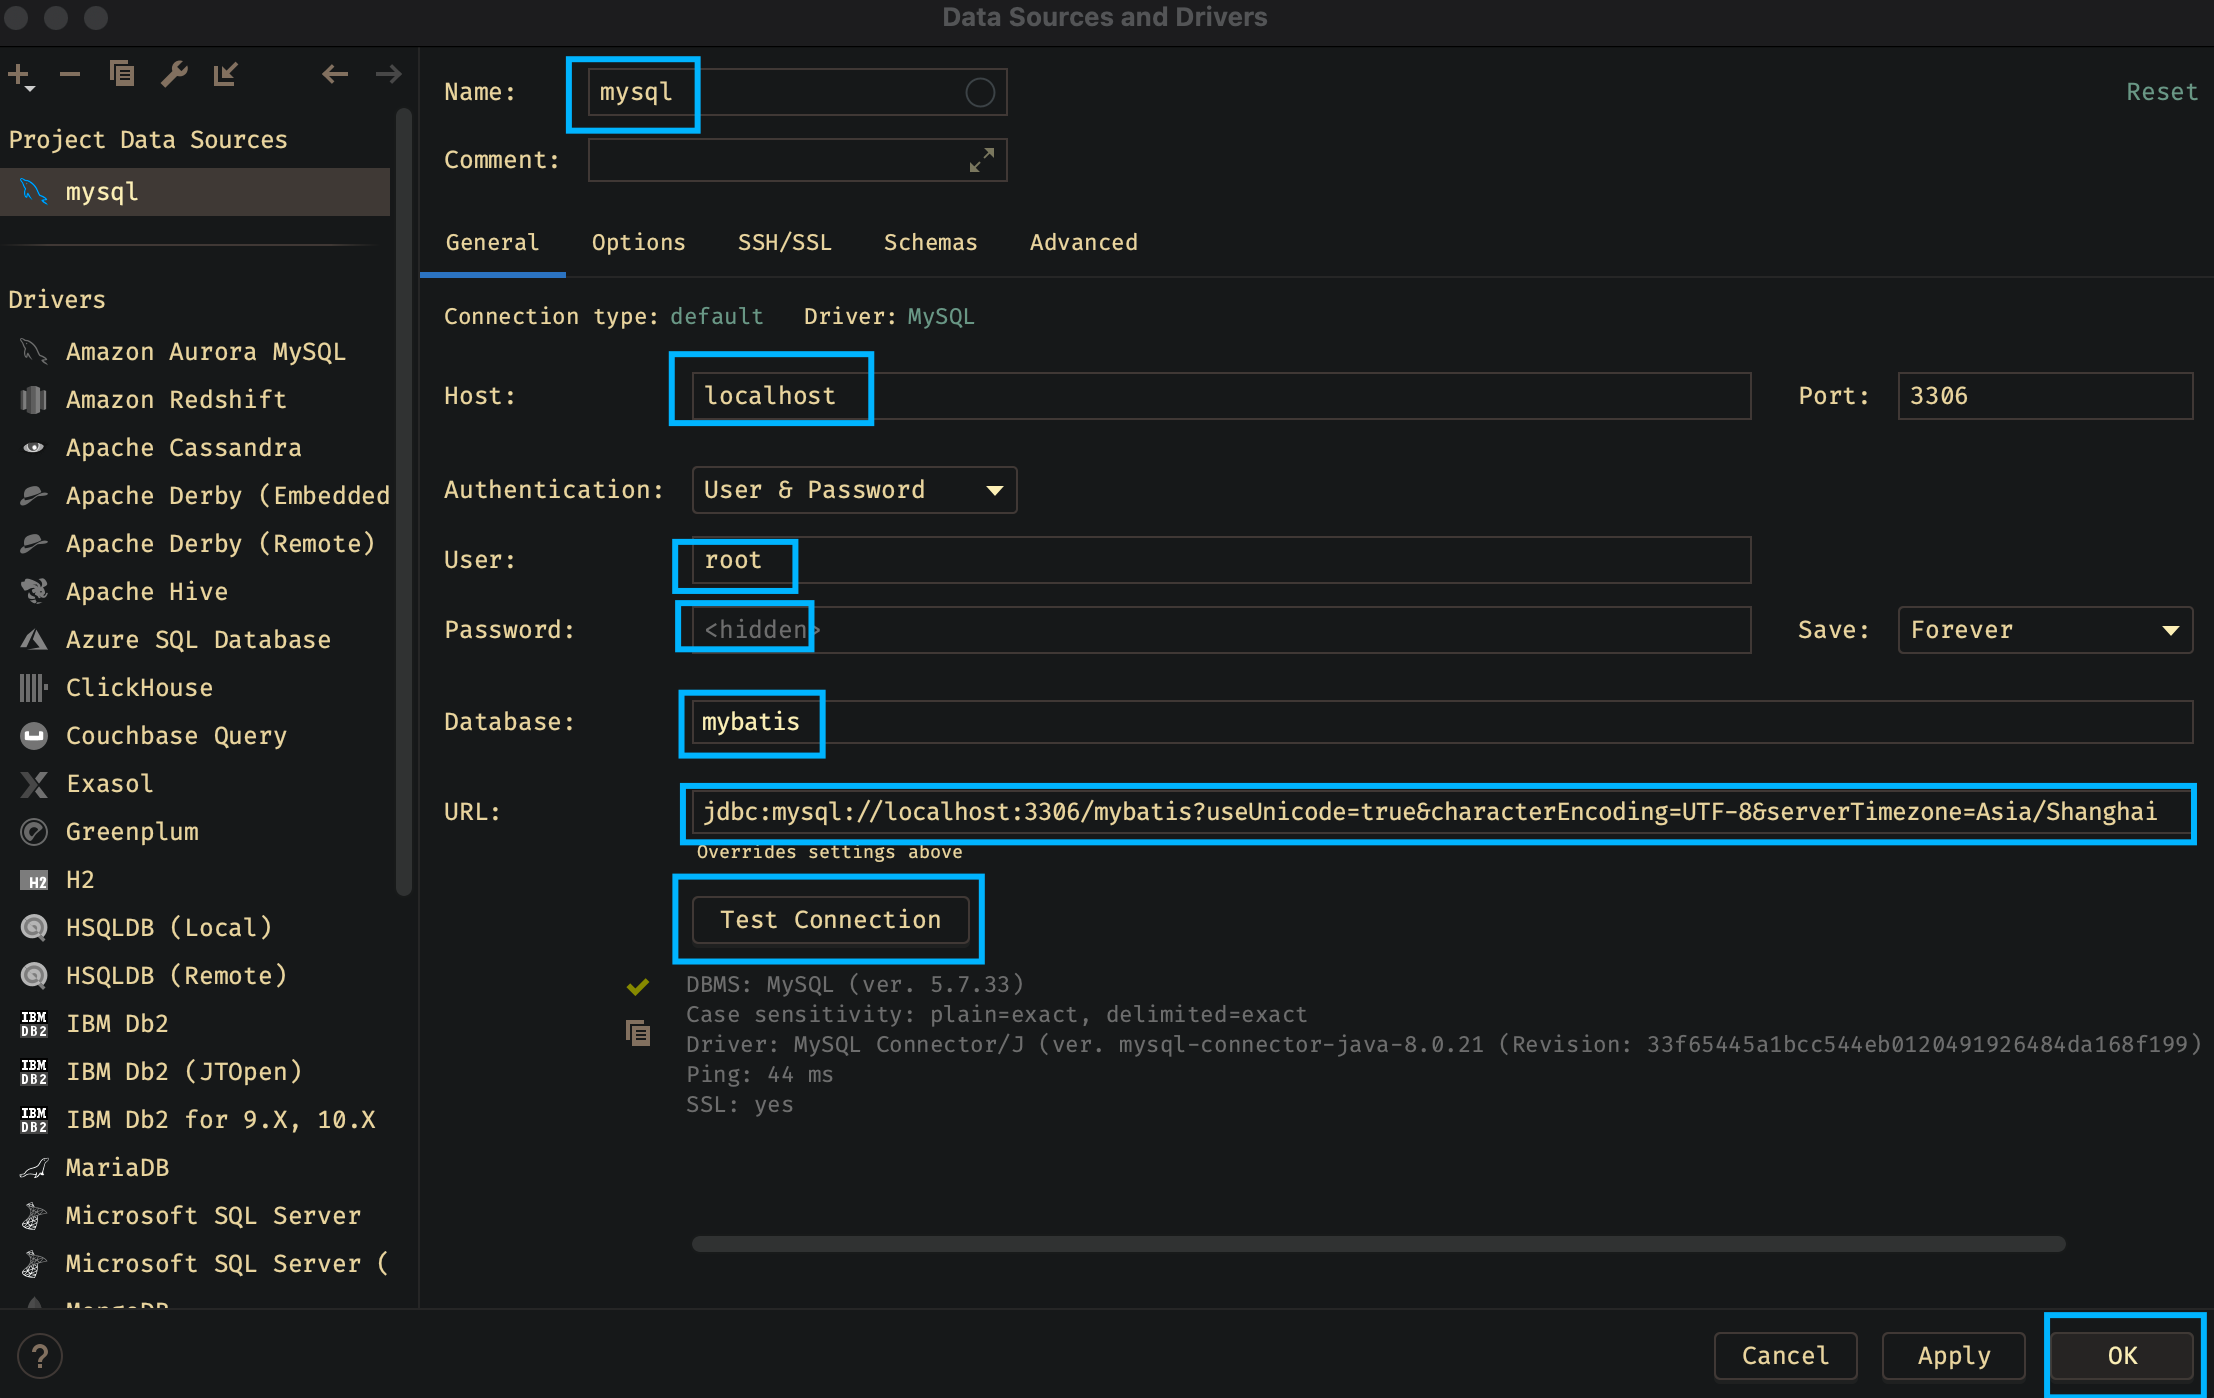
我们输入相应的信息,测试通过后点击 OK:
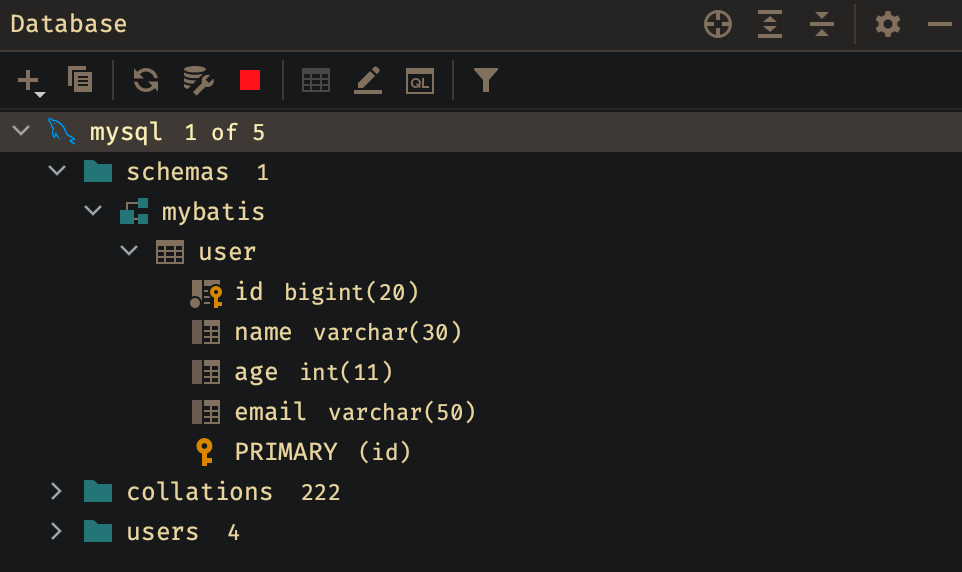
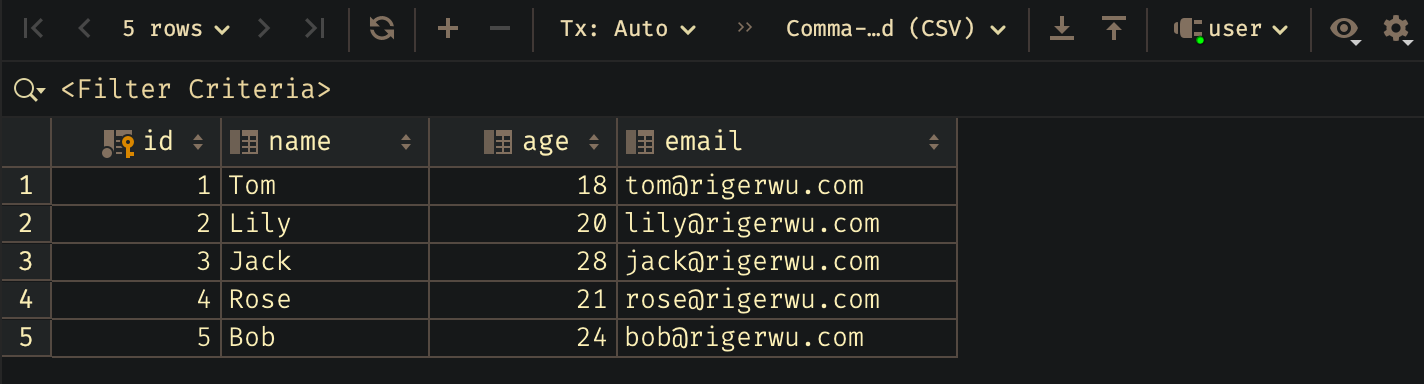
这样我们就可以直接查看到表和数据了:
双击表名可以直接查询数据:
3. 依赖引入与配置 新建一个 web-mybatis 项目,引入 mybatis 的 starter,和 druid 数据源:
你们可以再 Maven 仓库查找 mybatis-starter 和 druid 的最新版本
<dependency > <groupId > org.mybatis.spring.boot</groupId > <artifactId > mybatis-spring-boot-starter</artifactId > <version > 2.1.4</version > </dependency > <dependency > <groupId > com.alibaba</groupId > <artifactId > druid-spring-boot-starter</artifactId > <version > 1.2.4</version > </dependency >
yml 里做相应配置:
1 2 3 4 5 6 7 8 9 10 11 12 13 14 15 16 17 18 19 20 21 22 23 24 25 26 27 28 29 30 31 32 33 34 35 36 37 38 39 40 41 42 43 44 45 46 47 48 49 50 51 52 53 54 55 56 57 58 59 60 61 62 server: port: 8090 spring: application: name: web-mybatis datasource: username: root password: 123456 url: jdbc:mysql://localhost:3306/mybatis?useUnicode=true&characterEncoding=UTF-8&serverTimezone=Asia/Shanghai driver-class-name: com.mysql.cj.jdbc.Driver type: com.alibaba.druid.pool.DruidDataSource druid: initial-size: 10 min-idle: 10 maxActive: 200 maxWait: 60000 timeBetweenEvictionRunsMillis: 60000 minEvictableIdleTimeMillis: 300000 validationQuery: SELECT 1 testWhileIdle: true testOnBorrow: false testOnReturn: false poolPreparedStatements: true maxPoolPreparedStatementPerConnectionSize: 20 connectionErrorRetryAttempts: 3 breakAfterAcquireFailure: true timeBetweenConnectErrorMillis: 300000 asyncInit: true remove-abandoned: true remove-abandoned-timeout: 1800 transaction-query-timeout: 6000 filters: stat,wall,slf4j connectionProperties: druid.stat.mergeSql\=true;druid.stat.slowSqlMillis\=5000 web-stat-filter: enabled: true url-pattern: /* exclusions: "*.js,*.gif,*.jpg,*.bmp,*.png,*.css,*.ico,/druid/*" stat-view-servlet: enabled: true url-pattern: /druid/* allow: reset-enable: true login-username: riger login-password: riger filter: slf4j: enabled: true statement-executable-sql-log-enable: true mybatis: mapper-locations: classpath:mapper/*.xml configuration: map-underscore-to-camel-case: true type-aliases-package: com.rigerwu.web.mybatis.entity logging: level: com.rigerwu.web.mybatis.mapper: debug
启动类上加上 MapperScan,这样我们不用每个接口上都标上 @Mapper 注解了:
@MapperScan(basePackages = {"com.rigerwu.web.mybatis.mapper"})
4. 插件的基本使用 接下来,重点来了!我们打开 Settings -> plugins -> marketplace -> 搜索 MybatisX,下载安装:
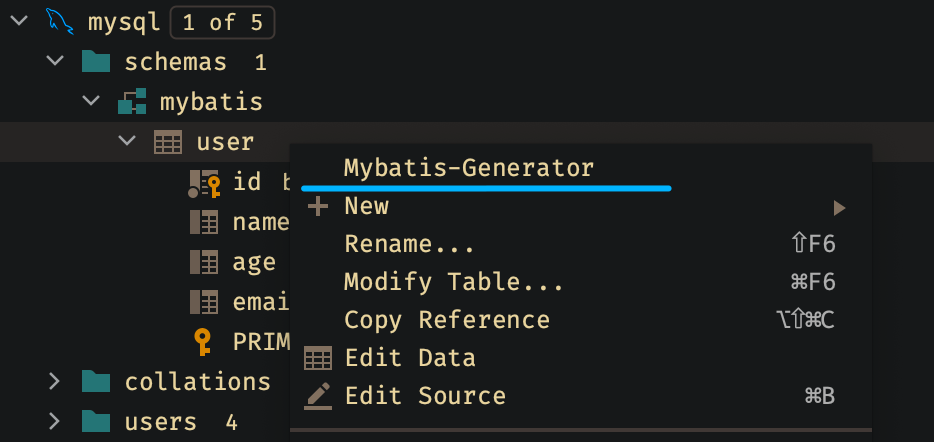
今后我们怎么写 XML 和 接口?不用写,直接生成!我们在 User 表上右键,选择 Mybatis-Generator :
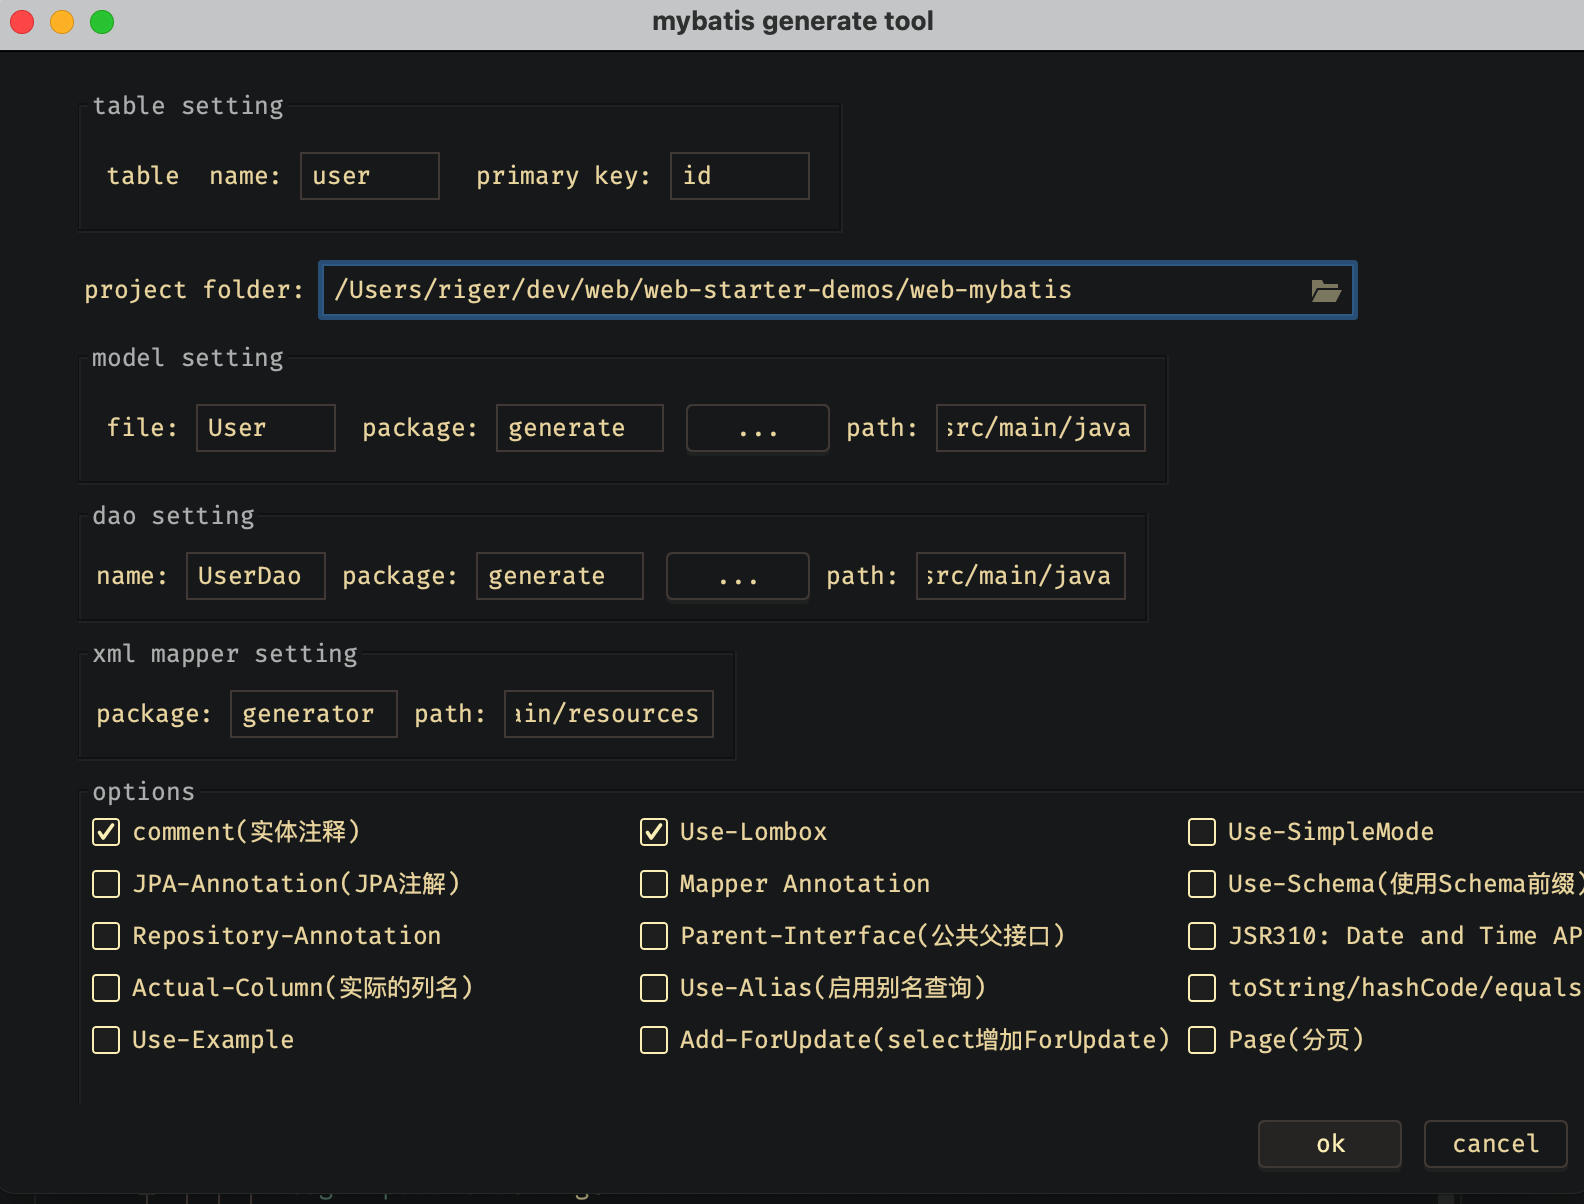
填好包名和路径,点击OK,这里为了代码简洁,我还勾选了 Lombok:
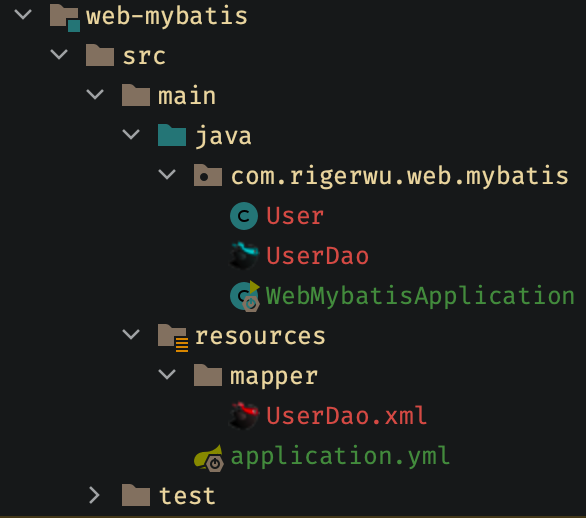
点击后生成了三个文件(红色未 add 的三个,这里我方便演示没再分包了):
User.java
1 2 3 4 5 6 7 8 9 10 11 12 13 14 15 16 17 18 19 20 21 22 23 24 25 26 27 28 29 30 31 32 33 34 35 36 37 38 39 40 41 42 43 44 45 46 package com.rigerwu.web.mybatis;import java.io.Serializable;import lombok.Data;@Data public class User implements Serializable private Long id;private String name;private Integer age;private String email;private static final long serialVersionUID = 1L ;
UserDao.java
1 2 3 4 5 6 7 8 9 10 11 12 13 14 15 16 17 18 19 20 21 22 23 24 25 26 27 28 29 30 31 32 33 34 35 36 37 38 package com.rigerwu.web.mybatis;import com.rigerwu.web.mybatis.User;public interface UserDao int deleteByPrimaryKey (Long id) int insert (User record) int insertSelective (User record) User selectByPrimaryKey (Long id) ;int updateByPrimaryKeySelective (User record) int updateByPrimaryKey (User record)
UserDao.xml
1 2 3 4 5 6 7 8 9 10 11 12 13 14 15 16 17 18 19 20 21 22 23 24 25 26 27 28 29 30 31 32 33 34 35 36 37 38 39 40 41 42 43 44 45 46 47 48 49 50 51 52 53 54 55 56 57 58 59 60 61 62 63 64 65 66 67 68 69 70 71 72 73 74 75 76 77 78 79 80 81 82 83 84 <?xml version="1.0" encoding="UTF-8"?> <!DOCTYPE mapper PUBLIC "-//mybatis.org//DTD Mapper 3.0//EN" "http://mybatis.org/dtd/mybatis-3-mapper.dtd" > <mapper namespace ="com.rigerwu.web.mybatis.UserDao" > <resultMap id ="BaseResultMap" type ="com.rigerwu.web.mybatis.User" > <id column ="id" jdbcType ="BIGINT" property ="id" /> <result column ="name" jdbcType ="VARCHAR" property ="name" /> <result column ="age" jdbcType ="INTEGER" property ="age" /> <result column ="email" jdbcType ="VARCHAR" property ="email" /> </resultMap > <sql id ="Base_Column_List" > </sql > <select id ="selectByPrimaryKey" parameterType ="java.lang.Long" resultMap ="BaseResultMap" > <include refid ="Base_Column_List" /> </select > <delete id ="deleteByPrimaryKey" parameterType ="java.lang.Long" > </delete > <insert id ="insert" keyColumn ="id" keyProperty ="id" parameterType ="com.rigerwu.web.mybatis.User" useGeneratedKeys ="true" > </insert > <insert id ="insertSelective" keyColumn ="id" keyProperty ="id" parameterType ="com.rigerwu.web.mybatis.User" useGeneratedKeys ="true" > <trim prefix ="(" suffix =")" suffixOverrides ="," > <if test ="name != null" > </if > <if test ="age != null" > </if > <if test ="email != null" > </if > </trim > <trim prefix ="values (" suffix =")" suffixOverrides ="," > <if test ="name != null" > </if > <if test ="age != null" > </if > <if test ="email != null" > </if > </trim > </insert > <update id ="updateByPrimaryKeySelective" parameterType ="com.rigerwu.web.mybatis.User" > <set > <if test ="name != null" > </if > <if test ="age != null" > </if > <if test ="email != null" > </if > </set > </update > <update id ="updateByPrimaryKey" parameterType ="com.rigerwu.web.mybatis.User" > </update > </mapper >
看,单表的简单增删改查已经帮我们生成好了。
MybatisX 还能让我们快速得在 XML 和 Dao 之间跳转:
甚至能根据字段提示,自动帮我们写增删改查的 sql:
是不是爽歪歪?
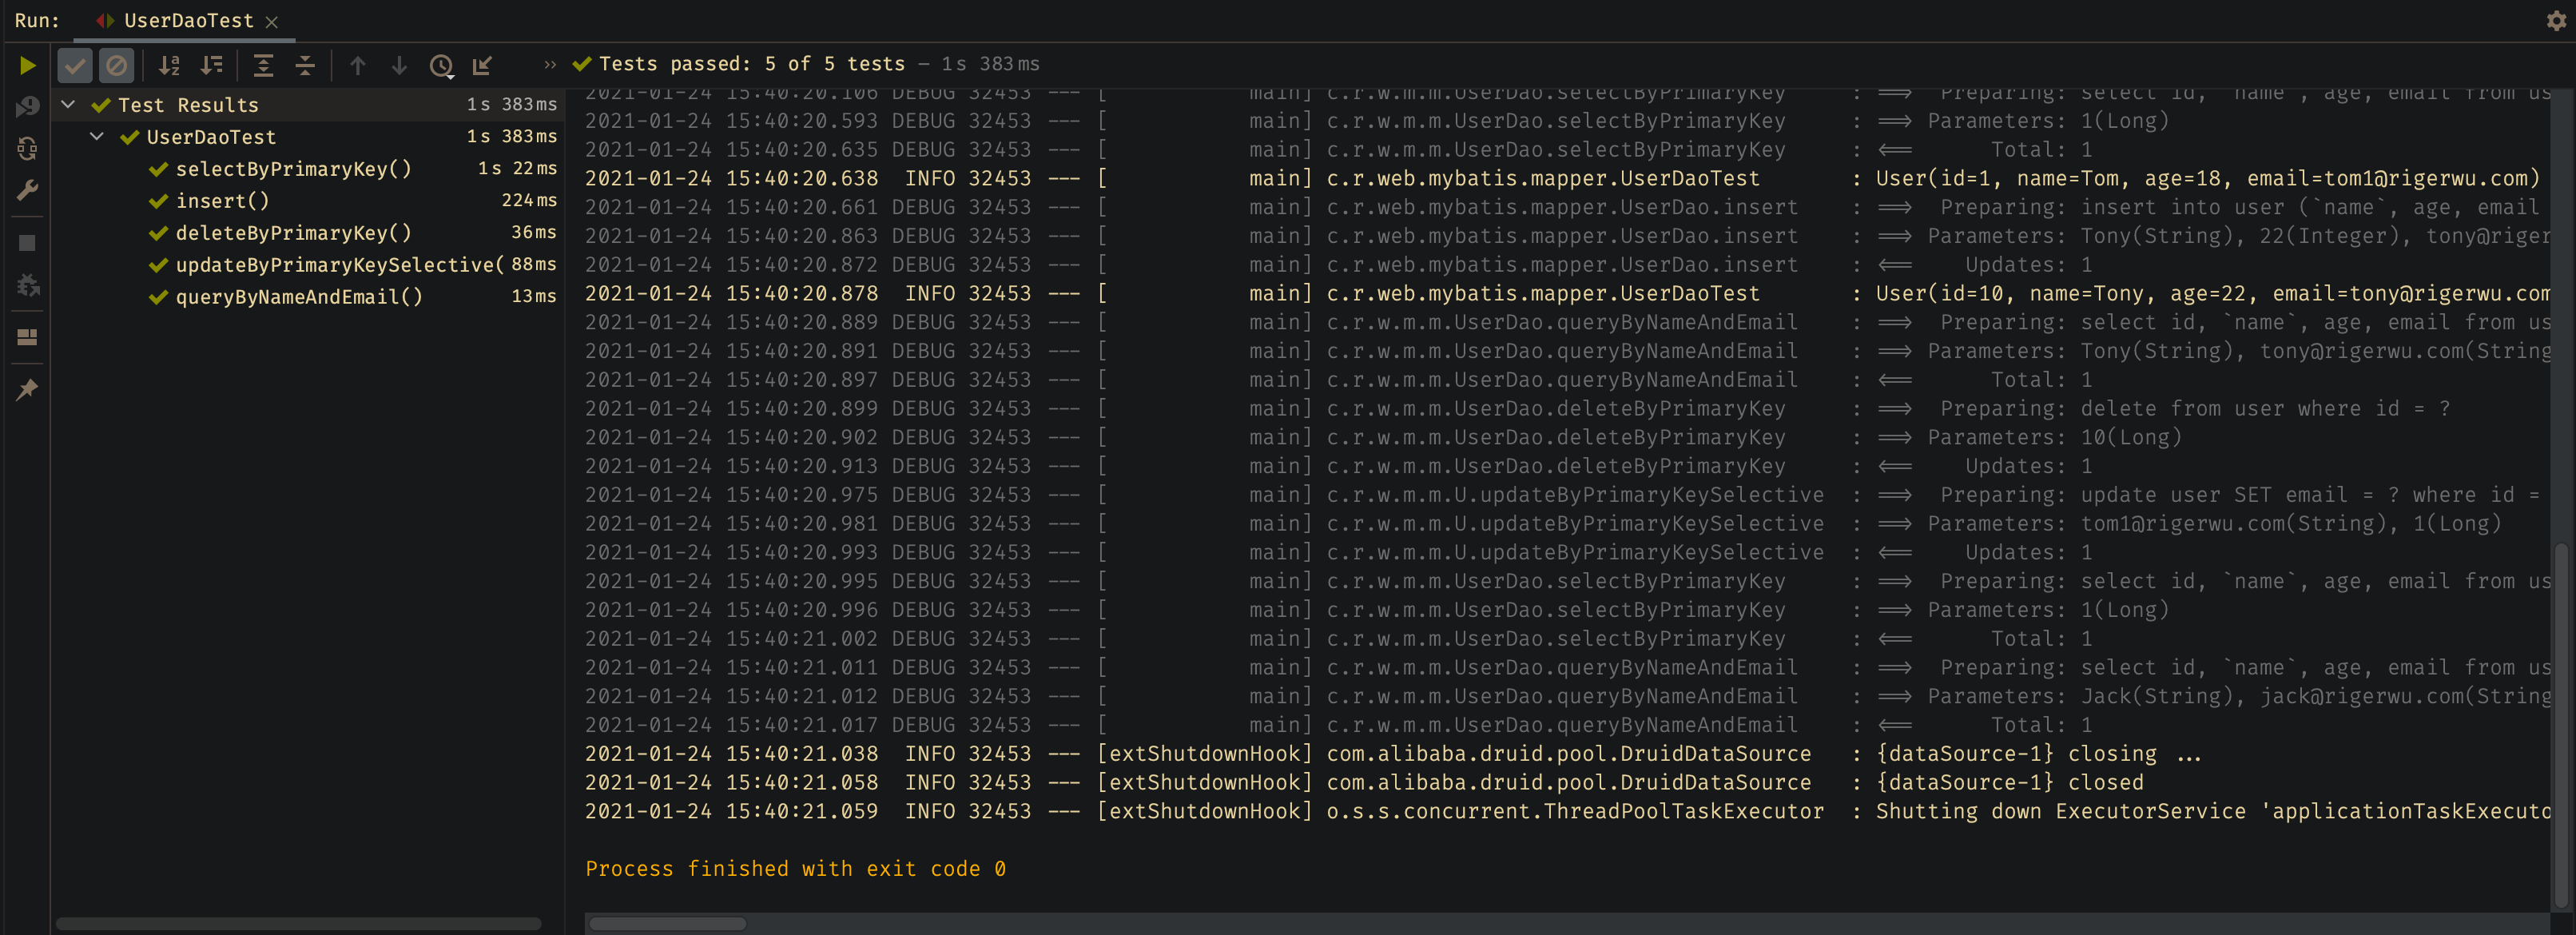
5. 测试 我们简单写个测试类,测几个方法:
1 2 3 4 5 6 7 8 9 10 11 12 13 14 15 16 17 18 19 20 21 22 23 24 25 26 27 28 29 30 31 32 33 34 35 36 37 38 39 40 41 42 43 44 45 46 47 48 49 50 51 52 53 54 55 56 57 58 59 60 61 62 package com.rigerwu.web.mybatis.mapper;import com.rigerwu.web.mybatis.entity.User;import lombok.extern.slf4j.Slf4j;import org.junit.jupiter.api.Assertions;import org.junit.jupiter.api.Test;import org.springframework.beans.factory.annotation.Autowired;import org.springframework.boot.test.context.SpringBootTest;import java.util.List;@Slf4j @SpringBootTest class UserDaoTest @Autowired private UserDao userDao;@Test void insert () new User();"Tony" );22 );"tony@rigerwu.com" );0 );@Test void deleteByPrimaryKey () "Tony" , "tony@rigerwu.com" );int i = userDao.deleteByPrimaryKey(user.getId());0 );@Test void selectByPrimaryKey () 1L );long ) user.getId(), 1 );@Test void updateByPrimaryKeySelective () new User();1L );"tom1@rigerwu.com" );int i = userDao.updateByPrimaryKeySelective(user);0 );1L );"tom1" ));@Test void queryByNameAndEmail () "Jack" , "jack@rigerwu.com" );1 );
顺利通过测试:
6. Druid监控 我们使用的是 Druid 数据源,并在配置文件配置了相应监控的配置,接下来测试一下能付正常使用
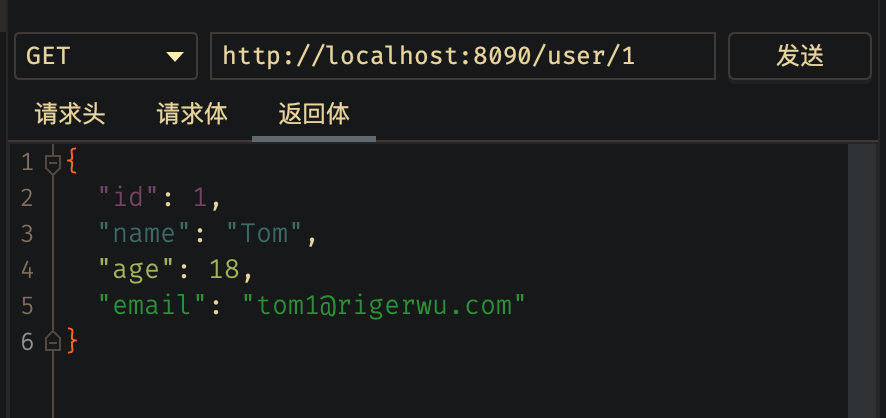
写一个简单的 Controller:
@RestController public class UserController @Autowired private UserDao userDao;@GetMapping("/user/{id}") public User getUserById (@PathVariable("id") Long id) return userDao.selectByPrimaryKey(id);
我们项目启动起来,访问一下我们的 Controller:
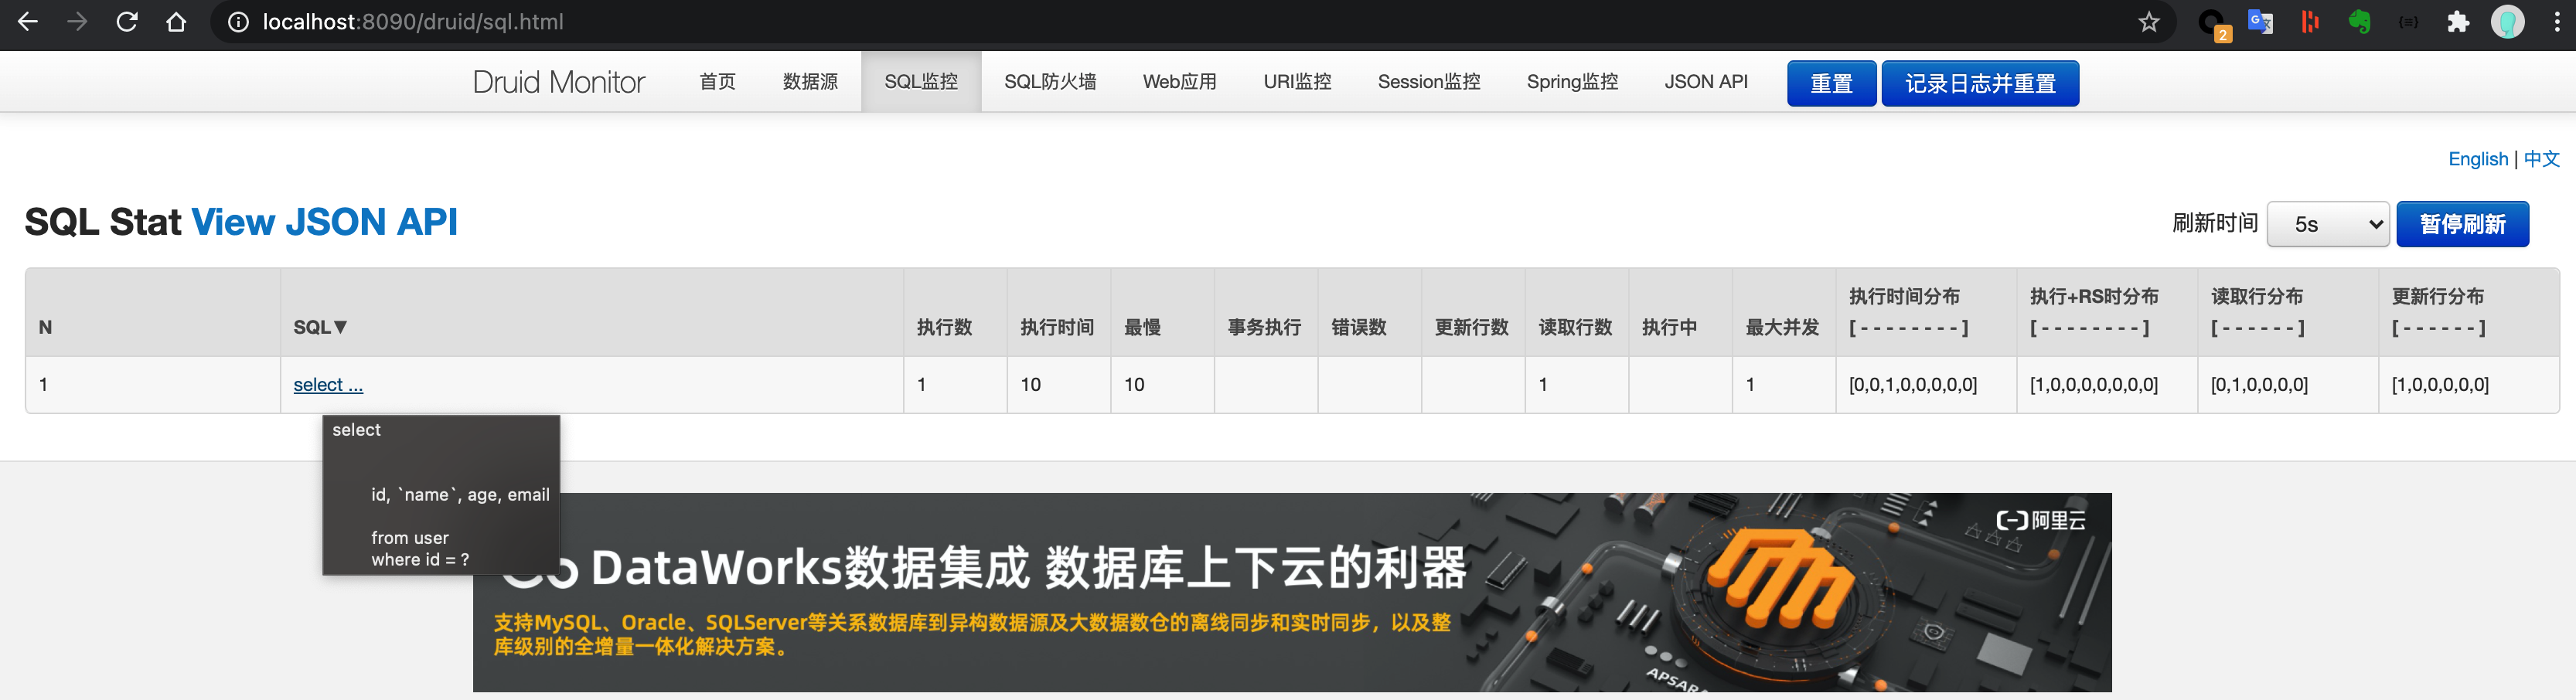
正常返回了结果,然后登录 druid 监控地址:http://localhost:8090/druid/
输入我们设置的账号密码:riger/riger,查看 Sql 监控:
可以看到我们的 SQL 执行记录,这在实际生产中可以帮我们分析慢SQL,和查看数据源状态,非常方便。
好了,Mybatis 入门就讲到这里。
源码及脚本都在Github 上
Enjoy it!